
By Muhammad Hanzala, Founder & Managing Editor · Updated October 31, 2026 · How we research our guides
Quick Answer
A door usually sags because its hinge screws have loosened, stripped their holes, or only grip the thin door jamb instead of the framing behind it. The top hinge takes the most strain. Fix it in this order and test the door after every step:
- Tighten all hinge screws by hand, top hinge first.
- Refill stripped screw holes with glued toothpicks or a wooden dowel.
- Replace one top-hinge screw with a 2½ to 3 inch screw that reaches the wall framing.
- Add a thin shim behind a hinge if the door still binds.
- Plane or sand the edge only as a last resort.
Check first: if the door is fire-rated or your home was built before 1978, read the safety section before cutting, planing or sanding anything.
If your door is sagging, you probably noticed it the annoying way: a scrape where the door meets the frame near the top, a latch that no longer lines up with the strike plate, or a door that only closes when you lift the handle. This guide on how to fix a sagging door is built around one idea: diagnose first, then repair in the order that does the least damage.
Many quick guides jump straight to “tighten the screws.” That only helps if loose screws are the real problem. If the hole is stripped, the hinge is worn or the frame has moved, tightening the same screw again and again can make things worse. Below you will find a five-minute check that points to the right fix, the repair steps in order, safety checks that most guides skip, and a simple log so you can see whether the repair is holding.
In this guide
Why a Door Starts to Sag
A door is a heavy lever hanging from its hinges. Its weight pulls the top hinge away from the jamb and presses the bottom hinge into it, so the top hinge screws carry the hardest pull. Trade and DIY sources repeatedly point to the top hinge for this reason: its screws often bite only into the thin jamb rather than the solid framing behind it (Hunker).
The usual causes are:
- Short hinge screws that grip only the jamb, not the framing behind it.
- Stripped or enlarged screw holes, where the screw spins and never tightens.
- Worn or bent hinges, or hinge leaves that no longer sit flush in their cut-outs.
- A heavy or swollen door, such as a solid-core or exterior door that absorbs humidity.
- Frame or house movement. If several doors have started to stick, the cause may be bigger than one hinge (Mr. Handyman notes that the foundation can be involved).
- Extra load, like a door that is slammed often or used as a hanging point.
Knowing which cause applies saves you from buying parts you do not need. The rest of this guide shows how to fix sagging door hinges, screw holes and fit problems in the order that causes the least damage.
Diagnose First: The 5-Minute Door Check
Knowing how to fix door sagging starts with knowing exactly where the door has moved. Do these checks with the door closed and good light, and take a photo of the gaps before you touch anything so you can compare afterward.
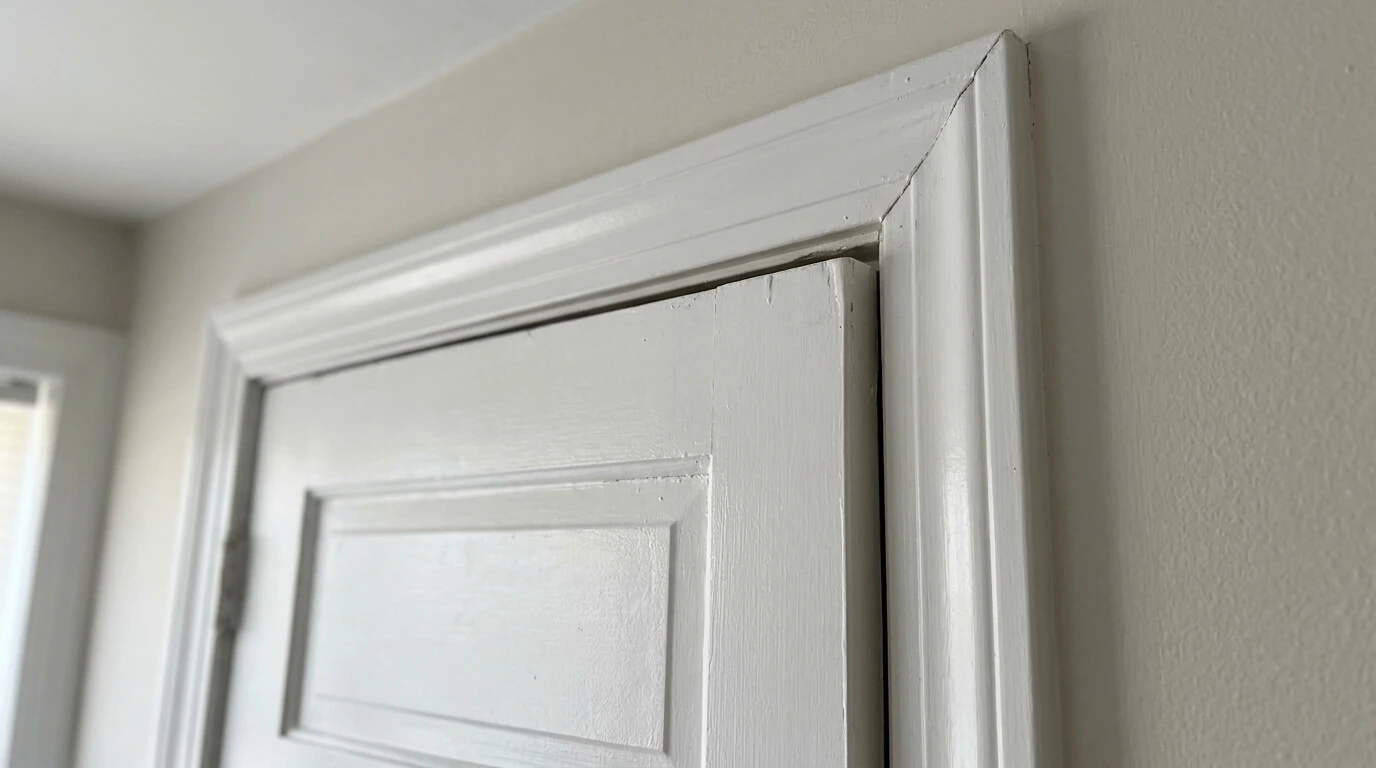
- Read the gaps. On a well-hung door the gap around the top and sides looks even. About 1/8 inch (3 mm) is a commonly used target, though older frames vary. A dropped door typically has a tight spot near the top of the latch side and a wedge-shaped gap along the top.
- Run a paper strip around the edge. Slide a strip of paper between the closed door and the frame. Where it grips hard, the door is touching; where it falls through, the gap is wide.
- Mark the rub points. Rub chalk or soft pencil along the door edge, open and close the door once, then look for the transfer mark on the frame.
- Do the lift test. Open the door to about 90 degrees and gently lift the handle end. If a hinge leaf shifts or the jamb flexes, the anchoring is loose. Take care with a heavy door.
- Inspect the hinges. Look for screw heads that stick out, oval or enlarged holes, bent leaves and hinges that do not sit flush.
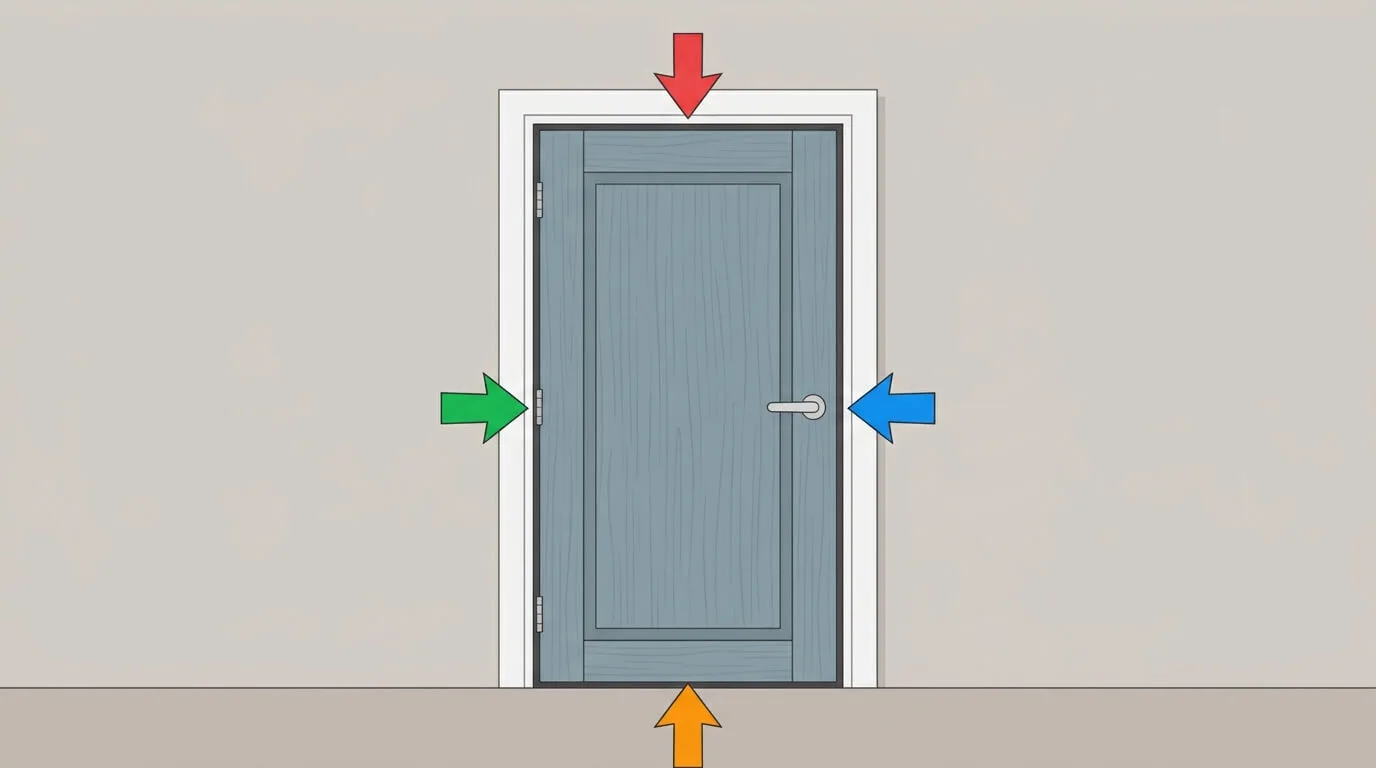
Match what you see to the likely cause:
| What you notice | Likely cause | Start with |
|---|---|---|
| Door rubs the latch-side frame near the top; the gap along the top is wider on the latch side | Hinge side has dropped, often a loose or pulled-out top hinge | Steps 1 to 3 |
| Latch bolt hits the strike plate below the hole | The whole door has dropped | Fix the hinges, adjust the strike plate last |
| A screw spins without tightening, or a hinge leaf moves when you lift the handle | Stripped screw holes | Steps 2 and 3 |
| Door drags only at the bottom; hinge screws are tight and the top gap is even | Swollen door, floor or threshold change | See “When the door itself is the problem” |
| Hinge leaf sticks out of its cut-out, or the door rubs on the hinge side | Hinge not seated, paint build-up or raised screw heads | Reseat or replace the hinge |
| Several doors stick, floors slope, or cracks appear near door frames | Possible structural movement | Call a professional |
Tools and Materials You Need
A basic door sagging repair needs few tools. Most of the list is hardware-store basics.
Required for most repairs
- Manual screwdriver that matches your hinge screws (Phillips or flat). Hand tightening gives you control; Mr. Handyman advises against power drills for final tightening because they strip holes easily.
- Wood screws, 2½ to 3 inches long, coarse thread, with a head that sits flush in the hinge hole.
- Wood glue and wooden toothpicks or a hardwood dowel (golf tees also work) for stripped holes.
- Drill with a 1/8 inch bit, used only to make pilot holes.
- A wedge or door jack, or a helper, to support the door while hinge screws are loose.
- Pencil or chalk and a phone camera for the before and after record.
Only if the check calls for it
- Thin cardboard or plastic hinge shims
- Replacement hinges that match the old size, finish and corner shape
- Utility knife or flush-cut saw to trim dowels flush
- Small level
- Fine sandpaper or a hand plane (last resort)
- Safety glasses and a dust mask
Step-by-Step Repair in the Right Order
To repair sagging door hinges without making the damage worse, work through these steps in order and test the door after each one. Stop as soon as the door closes cleanly with an even gap. Before you start, wedge the latch edge of the door so its weight is off the hinges, and photograph the gaps.
Step 1: Tighten every hinge screw by hand
Start with the top hinge, then work down. Turn each screw until it is snug, not as hard as you can. If a screw tightens firmly, move on. If it keeps turning, the hole is stripped and you can go straight to Step 2. Close the door and look at the gap again; a loose hinge alone can account for a surprising amount of movement.
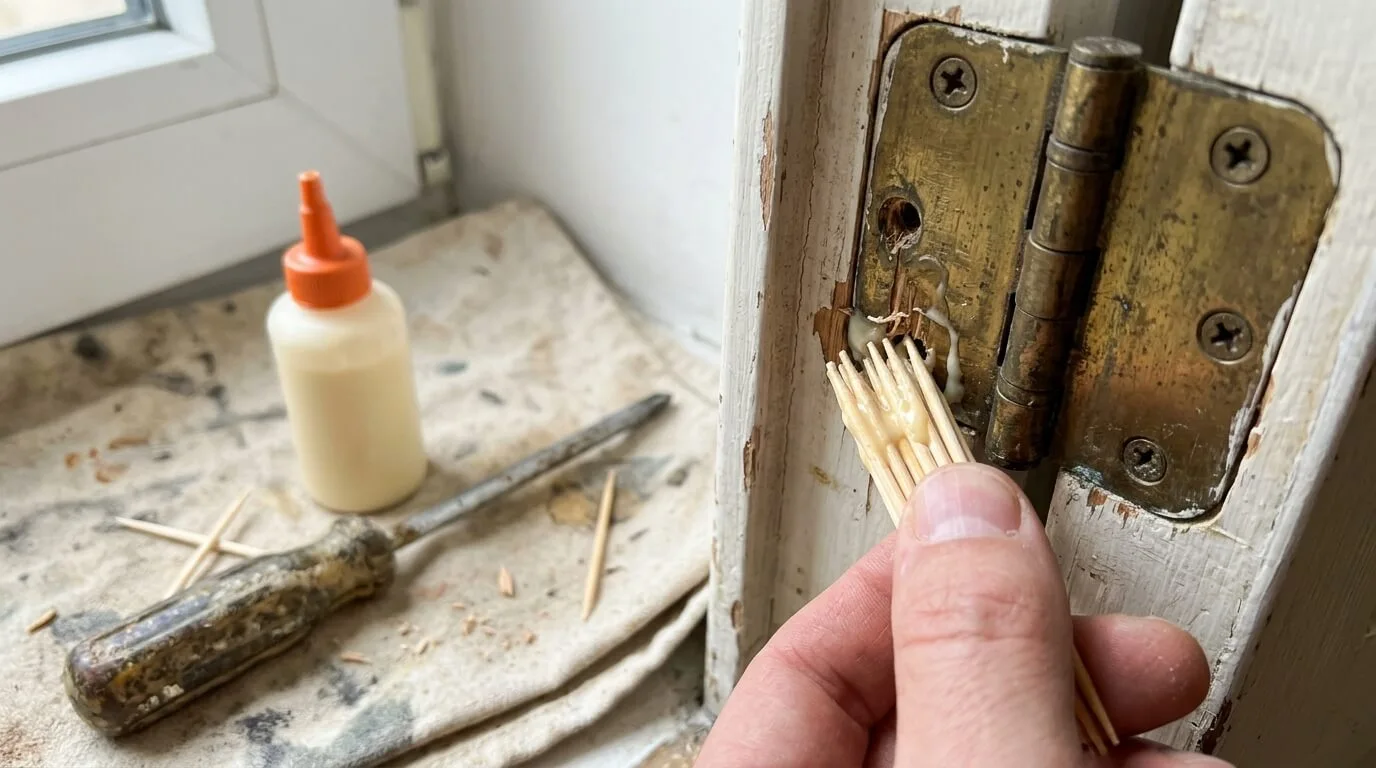
Step 2: Refill stripped screw holes
Remove the screw. Coat several toothpicks (or a short dowel sized to the hole) in wood glue, push them in until the hole is full, and let the glue cure as its label says. Trim the ends flush, drill a fresh 1/8 inch pilot hole, and reinstall the screw. This Old House describes several fills, including golf tees, toothpicks and a dowel with epoxy, and recommends vacuuming the hole first so dust does not weaken the bond. A dowel is the stronger option for heavy doors and badly enlarged holes.
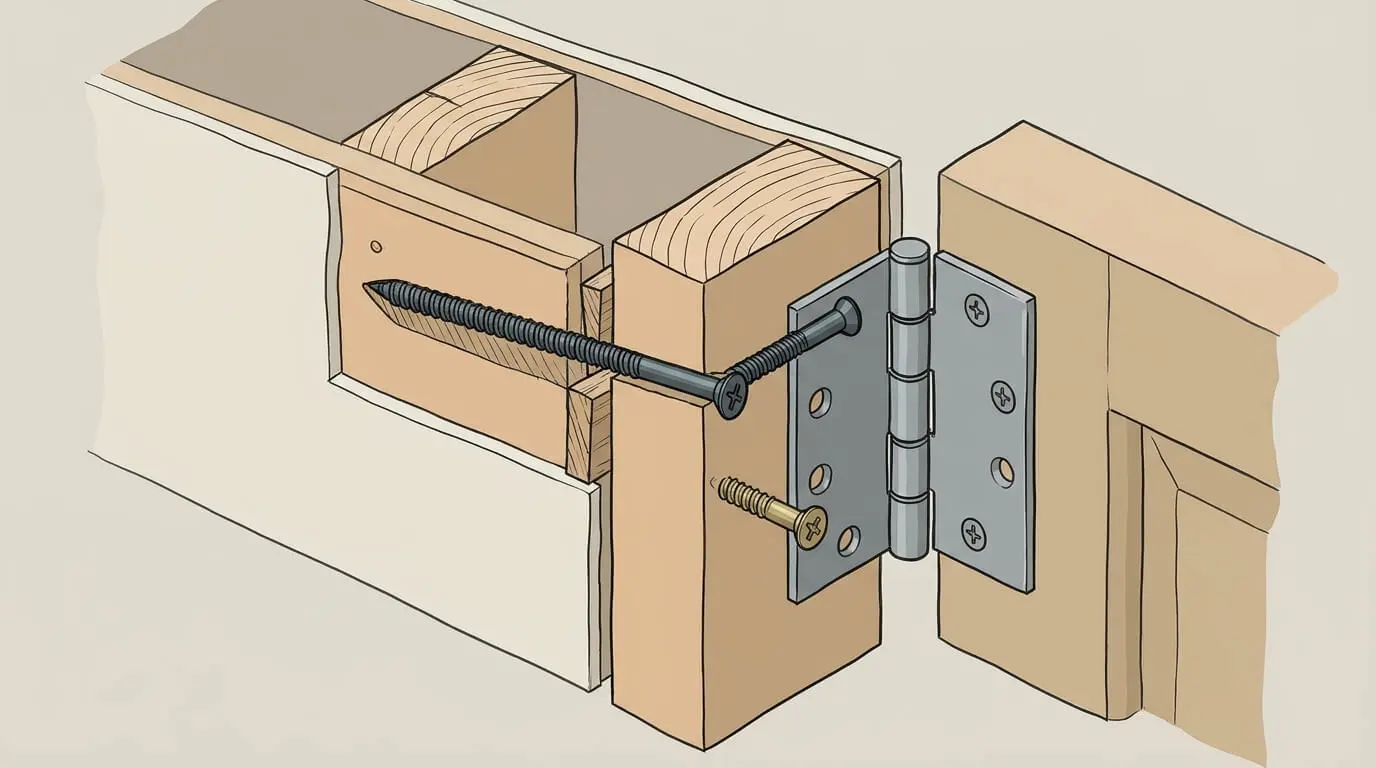
Step 3: Anchor the top hinge into the framing
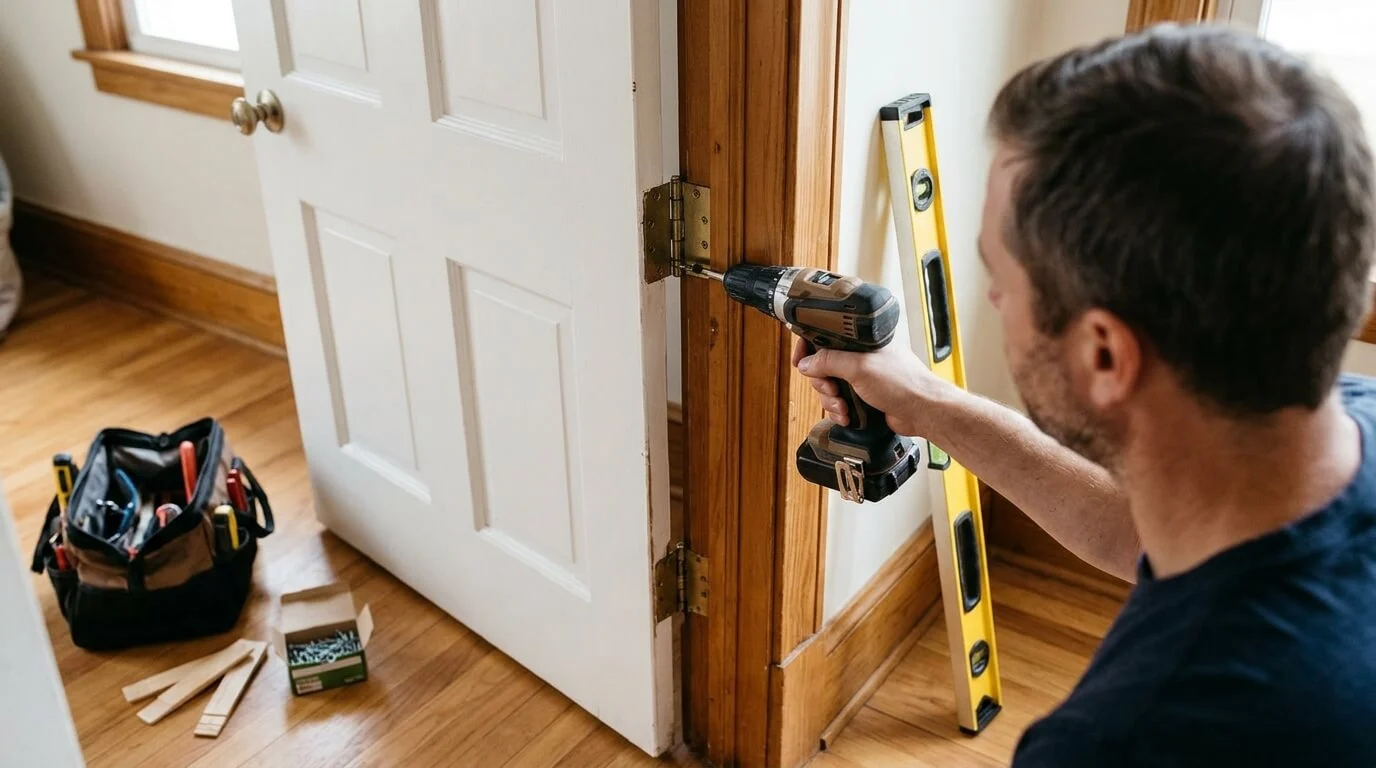
This is the step that most often corrects a drooping door. Remove the middle screw from the jamb-side leaf of the top hinge and replace it with a 2½ to 3 inch screw that passes through the jamb and into the framing behind it (Mr. Handyman recommends 3 inches). Drill a 1/8 inch pilot hole first, then drive the screw by hand.
The long screw draws the jamb slightly toward the framing and lifts the hinge side. To fix door sag without bowing the jamb, tighten a little at a time while watching the gap along the top, and stop when the gap looks even. If the door still drops, repeat on the middle hinge.
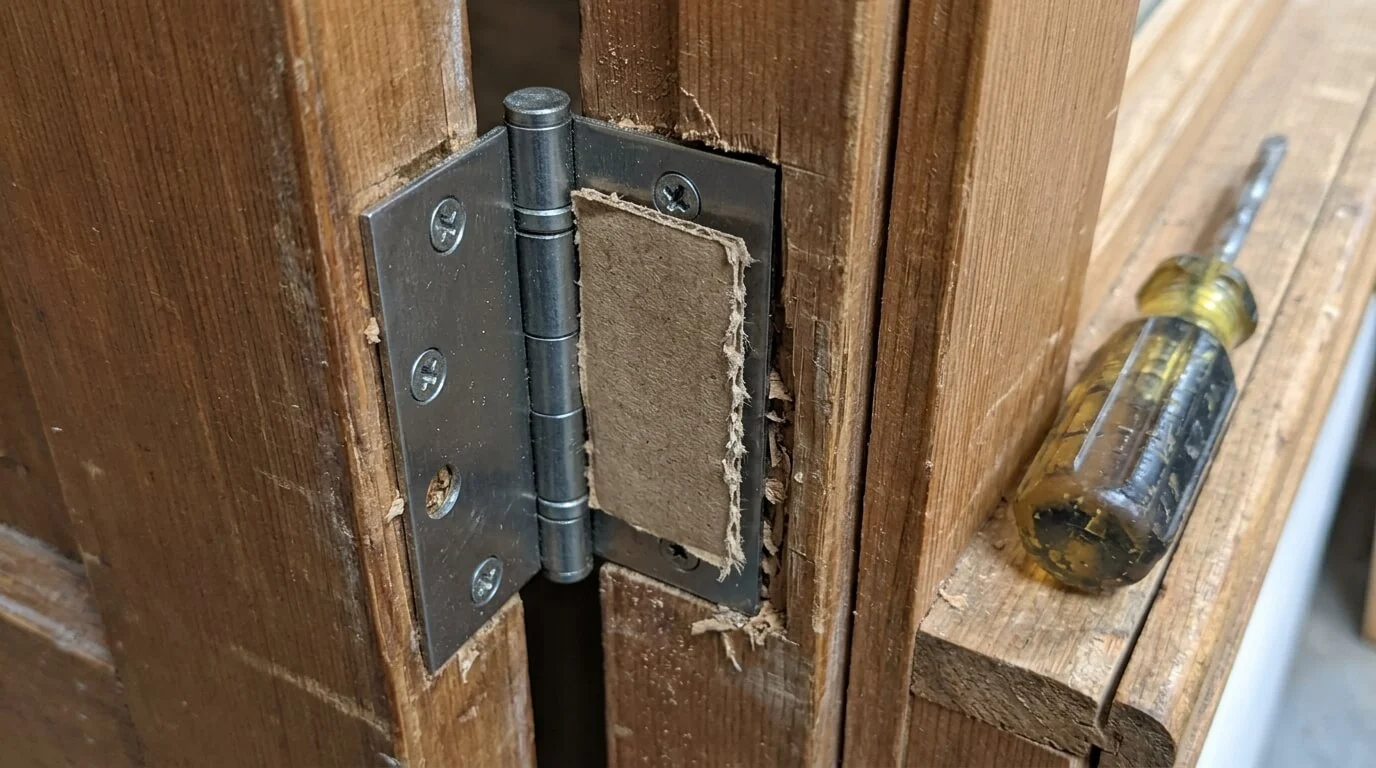
Step 4: Shim a hinge to correct a binding door
If the door is straight but still binds, a thin shim can shift it slightly. Support the door, loosen (do not remove) the screws on one hinge leaf, slide a piece of thin cardboard cut to the leaf’s shape behind it, and retighten. As a rule of thumb, if the door binds near the top of the latch side, shim the bottom hinge; if it binds near the bottom, shim the top hinge. Test it, and reverse the change if it makes things worse. Keep the shim thin; one layer of cereal-box cardboard moves the door more than you might expect.
Step 5: Plane or sand only as a last resort
If the hinges are solid and the door still touches the frame, remove a tiny amount from the rubbing edge, using the chalk marks from your check as a guide. Take paper-thin passes and test the fit each time. Seal any bare wood afterward with paint or varnish so it does not absorb moisture. Do not do this on a fire-rated door or on painted doors in older homes until you have read the safety section.
Step 6: Adjust the strike plate last
Only after the door hangs correctly should you look at the latch plate. Moving the strike plate first just hides a hinge problem and leaves the door rubbing.
How to Fix a Sagging Door That Won’t Latch
When the latch bolt misses the strike plate, the door has usually dropped, so the hinge repair comes before any latch adjustment. In practice, how to fix a sagging door that won’t latch comes down to a three-part check: repair the hinges (Steps 1 to 3), close the door, and see where the bolt now meets the plate.
To see exactly where it lands, put a little chalk or lipstick on the latch bolt and close the door once; the mark on the strike plate shows how far off you are. If the bolt now lands only slightly low or high, file the plate opening a little, or move the plate a small amount, rather than enlarging it dramatically. For a full strike-plate walkthrough, see our guide to fixing a door that won’t latch.
When the Door Itself Is the Problem
Not every fit problem comes from the hinges. Check these before you buy hardware:
- Seasonal change. If the door sticks in humid months and frees up in dry ones, moisture is a likely factor. Seal all door edges, including the top and bottom, which are easy to forget.
- Warped door. A door that no longer sits flat against the stop may need a professional’s assessment or replacement.
- Floor or threshold changes. New flooring or a raised threshold can make a healthy door drag. If the floor near the doorway also squeaks or flexes, the subfloor may be moving; our guide to fixing squeaky hardwood floors explains common causes.
- Hollow-core doors. These are lighter, but their screws can still strip out. The toothpick-and-glue repair in Step 2 applies to them too.
The same stripped-hole repair also works on loose cabinet hinges; see adjusting cabinet hinges for the cabinet version.
Safety Checks Most Guides Skip
Is it a fire-rated door?
Doors between an attached garage and the house, and doors in many apartment buildings, may be fire-rated. These doors are tested as a complete assembly, and the standard that covers them, NFPA 80, requires that no field changes have been made that void the label (iDigHardware summarizes the inspection criterion). That means no planing, cutting or extra holes, and the standard also specifies the hinges, fasteners and shims that may be used (iDigHardware). The Steel Door Institute lists unapproved field modifications among the common problems with fire doors. Look for a metal label, often on the hinge edge. If you find one, do not modify the door; call a qualified door or hardware professional.
Was your home built before 1978?
Older paint may contain lead, and planing or sanding a painted door edge creates dust. Under the U.S. EPA’s Renovation, Repair and Painting program, paid renovators in pre-1978 housing must use lead-safe work practices, and the same caution is sensible for DIY work. The HUD and EPA guidance lists open-flame burning and power sanding or planing without a HEPA-equipped tool among the practices to avoid. Fixing the hinges often means you never need to sand at all, so do that first. If you must remove paint from an older home, consider hiring a lead-safe certified professional.
When to Call a Professional
Some jobs are beyond a hinge adjustment. Call a carpenter, door specialist or other qualified professional if:
- The door frame is cracked, split, warped or pulling away from the wall.
- Even long screws no longer grip, or the wood around the hinges has crumbled.
- Several doors are sagging, floors slope, or cracks appear near door frames or above them, which can point to settlement.
- The door is very heavy, glazed or an exterior security door, so it could fall or injure you during the repair.
- The door is fire-rated, or you cannot tell whether it is.
- The gaps return after you have corrected them.
- Planing is needed on a painted door in a pre-1978 home.
At that point, how to fix sagging door problems stops being a DIY question: a professional can find the cause instead of replacing parts at random. Take your before-and-after photos and your repair log (below); they tell the pro what has already been tried.
Mistakes to Avoid
- Tightening with a power drill. It is easy to over-tighten and strip the hole.
- Re-driving the same screw into a stripped hole. The wood has to be rebuilt first.
- Skipping the pilot hole. A long screw driven without one can split the jamb.
- Overdriving the long screw. It can bow the jamb and create a new rub point.
- Adjusting the strike plate first. The latch will line up, but the door will still rub.
- Planing before checking the hinges. Wood removed cannot be put back.
- Removing every hinge screw at once on a heavy door. Support the door and work one hinge at a time.
- Using mismatched screws or hinges. Heads that do not seat flush can catch the door.
- Leaving cut wood unsealed. Bare edges absorb moisture.
- Treating symptoms. Most quick repairs fail because the cause was never identified.
Keeping It Fixed: A 60-Second Door Check
A quick check every few months catches movement early. Open the door to 90 degrees and do the lift test, look at the gaps, and check that the screw heads are flush. If your last door sagging repair needed long screws, check that the top hinge has not moved again after the first few weeks. For tall or heavy doors, ask the door maker or a pro whether a third hinge is recommended.
Copy this log into a notes app and fill it in after each repair:
| Date | Door | Top gap / latch gap | What I changed | Result |
|---|---|---|---|---|
| Example | Bedroom | Tight at top / bolt low | Dowel in hole, 3 inch screw in top hinge | Latches; re-check in 1 month |
Quick Reference: Numbers Worth Remembering
| Item | Guideline | Basis |
|---|---|---|
| Top hinge anchor screw | 2½ to 3 inches, reaching the framing | Mr. Handyman and other DIY sources |
| Pilot hole for a long hinge screw | About 1/8 inch | Common door-repair practice |
| Final tightening | By hand, not with a power drill | Mr. Handyman |
| Even gap around the door | Roughly 1/8 inch (3 mm), uniform | Common target; check the door maker’s guidance |
| Fire-rated door | No cutting, planing or extra holes | NFPA 80 inspection criterion |
| Painted door in a pre-1978 home | No dry sanding or power planing | EPA / HUD lead-safe guidance |
Final Thoughts
The whole approach to how to fix a sagging door fits in one sentence: find the cause before you change the hardware. Check where the door rubs, repair the hinge anchoring from the gentlest fix to the strongest, and leave planing, strike-plate changes and replacement for last. Most of the time that means a screwdriver, a few toothpicks or a dowel, and one long screw, not a new door.
Frequently Asked Questions
Can I fix a sagging door without taking it off its hinges?
Usually, yes. Tightening screws, refilling stripped holes and swapping in a long top-hinge screw can all be done with the door in place. Support the door with a wedge or a helper so its weight is off the hinge you are working on, and work on one hinge at a time.
My door is sagging even after I tightened every screw. What now?
Tight screws only help if the wood is holding them. Check for stripped holes, a bent or worn hinge, or damage around the hinge. Refill stripped holes, add a 2½ to 3 inch screw to the top hinge, and if the problem returns, have the frame inspected.
What is the quickest way to fix door sag?
Tighten the top hinge screws by hand. If the screws spin, replace the middle top-hinge screw with a long one that reaches the framing, after drilling a pilot hole. If the hole is badly stripped, fill it with glued wood first so the long screw has something to grip.
How to fix door sagging on a hollow-core door?
Hollow-core doors are lighter, so the same sequence works: tighten, then rebuild stripped holes with toothpicks or a dowel and wood glue, then reinstall the screws. Avoid over-tightening, and replace the hinge if its leaf is bent.
Do I need new hinges to repair sagging door hinges?
Not usually. Replace a hinge only if it is bent, worn or no longer sits flush, and choose one that matches the old hinge’s size, corner shape and placement so the door still fits the cut-outs.
Is it safe to plane or sand a sagging door?
Only after the hinges are fixed. Do not modify a fire-rated door. In a home built before 1978, avoid dry sanding or power planing painted surfaces because of possible lead paint, and consider a lead-safe certified professional.
How long will the repair last?
A repair with long screws, filled holes or a shim can last for years on a well-supported door, but very heavy doors and homes with shifting foundations may need periodic re-checks. If the gap keeps changing, ask a professional to look at the frame.
When is a sagging door a sign of a bigger problem?
Be concerned if several doors in the home stick at once, floors slope, or cracks appear around door frames. Those patterns can point to settlement, which needs a qualified assessment rather than a hinge repair.
Sources and Further Reading
This guide compares methods and safety guidance published by the sources below. It is general information, not a substitute for a licensed contractor; see our Disclaimer and Editorial Standards.
- Mr. Handyman: step-by-step sagging door guide – screw length, glued toothpicks, hand tightening, whole-house causes
- This Old House: How to Repair a Stripped Screw Hole – fill options and hole preparation
- Hunker: How to Fix a Sticking or Sagging Door – long screw into the framing
- U.S. EPA: Lead Renovation, Repair and Painting Program
- HUD: Lead-safe work practices (PDF)
- Steel Door Institute: Common Field Issues Affecting Fire Doors and Frames
- iDigHardware: NFPA 80 fire door inspection criteria

ABOUT THE AUTHOR
Muhammad Hanzala, Founder and Managing Editor
Hi, I am Muhammad Hanzala, the founder and managing editor of Make Maintain. My passion revolves around making living spaces functional, stylish, and well organized. Instead of claiming trade credentials, I approach home improvement as a dedicated researcher and practical home enthusiast. I build every guide by carefully studying official product documentation, interior organization standards, and established home care practices.